Slicer Actions let presentation designers decide which actions should happen when an end user picks an item from a slicer at runtime. The action that the designer configures either changes the tab displayed in a Mini-Tab slicer (Jump to Tab) or opens another slide in the presentation (Jump to Slide).
Slicer Actions can be either Simple or Advanced. Both modes create the same basic functionality for the end user but, while Simple guides your choices, Advanced allows you to define conditional functionality using PQL.
Important: When an end user selects values from a slicer at runtime, actions may open tabs or slides and interactions may filter visuals, update placeholders, and so on. Actions and interactions will not affect one another.
Tip: Slicer Actions aren't the only actions available; there are also other Actions in Present (or Discover). The Slicer Actions only include Jump to Tab and Jump to Slide.
Action Panel
Opening the Action Panel
Select a slicer and then right-click Actions on the context menu. The Actions panel opens at the bottom of the page.
Note: When you open the Actions context menu for a slicer, only the Jump to Mini Tab and Jump to Slide options are available.
Action Types
Select the type of Slicer Action that you want to create from the Action To Do dropdown list in the Action panel:
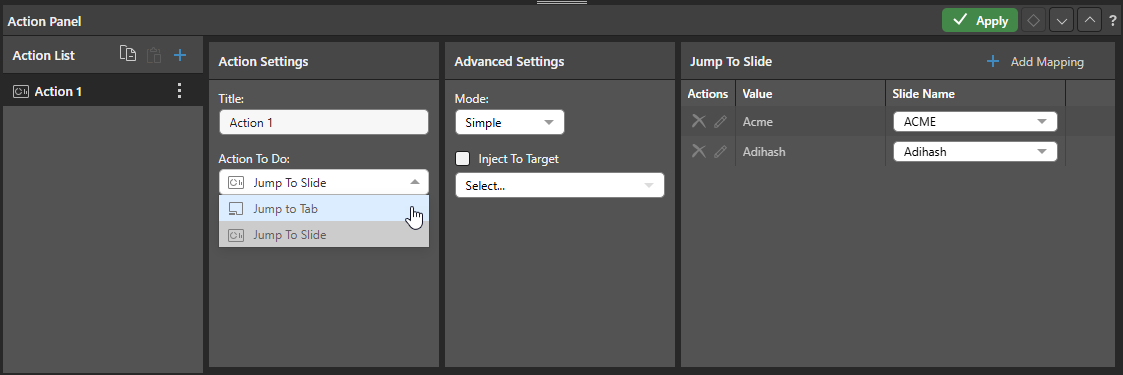
For a Slicer, the available actions are as follows:
Jump to Tab
The Jump to Tab action opens a specific tab in a Mini-Tab container. For example, where you use a mini-tab container to show visuals for sales, returns, and net profit, you could create a Jump to Tab action that opens the Returns page given particular selections by the end user.
- Click here for more information
Jump to Slide
The Jump to Slide action opens another slide in the current presentation. You can specify which slide using its number or name, go to the next or previous slide in the sequence, or use a PQL function to create your own Advanced jump option. You can also select Inject to Target to pass data selected at runtime to a Target, causing the visuals it has interactions with to be filtered or highlighted.
- Click here for more information
Execute Slice Actions at Runtime
To run slice actions at runtime, end users should simply select slice values from their slicer in the normal manner. In the following example, the configuration has been set up to select between the Sales pie chart tab and the Static visuals tab:
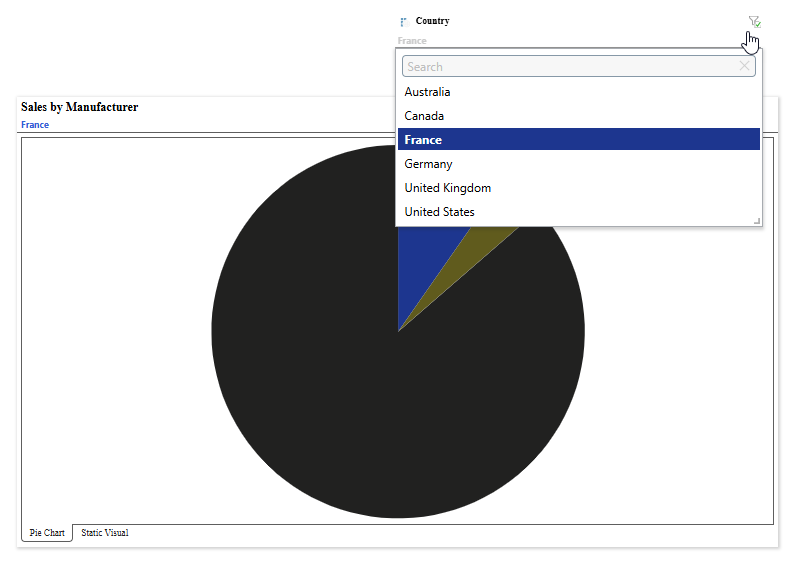
Note: Selecting France from the dropdown list selects the Mini-Tab with the name "Pie Chart" and filters the visual. The Jump to Tab Slicer Action drives the tab selection and the Slicer Interactions filter the visual.